Introduction
Yoga has been around for ages. It is renowned for its physical and mental advantages. One of its finest features is the capacity to ease chronic pain. Yoga can reduce back pain thanks to postures and sequences custom-made for the person.
In this article, we will explore the incredible power of yoga sequences and talk about how they can help you get back to a life free from pain.
Benefits of Yoga for Back Pain
Yoga is very efficient in treating and even reducing various types of back pain. It’s a holistic way to improve physical and mental health, and it’s been scientifically demonstrated to be less intrusive in giving relief from common back pain. As we age, our bones and muscles start to weaken, become imbalanced, and wear down due to daily activities and stress. Yoga helps restore natural balance by rebuilding strength while stretching, relaxing, and restoring muscle tone to stop more injuries. Studies have shown that with regular practice over time, yoga can even help regenerate injured muscles and joints.
The stretching part of yoga increases the tone of soft tissues like ligaments, tendons, fascia, and muscles along the spine, neck, and shoulder areas. This gives stability and strength for proper alignment of spinal vertebrae in different poses. The meditative side of yoga helps us move with awareness into positions which releases tension in muscles due to everyday activities. Additionally, through breathwork, oxygen is circulated throughout the body, naturally healing it and reducing soreness. Finally, we drift into a state of relaxation when we finish each session.
Benefits of Yoga Sequences
Yoga sequences are great for back health! Whether it’s twinges or chronic lower-back issues, yoga can help. It increases strength and flexibility. Plus, sequences can be modified to fit individual needs.
Benefits go beyond the physical. Mindful movement with aware breath calms the mind and reduces stress. Proper alignment in postures improves posture too. This can reduce muscular strain, leading to less pain.
Creating a personalized practice plan around your schedule gives you control. This allows for more positive outcomes and fewer visits to health professionals later.
Types of Yoga Sequences
Yoga sequences? A great way for managing back pain and healing! Need to reduce tension or heal an injury? There’s a yoga sequence for that. Let’s explore some of the types that can help with back pain:
Sun Salutation
Sun Salutation (Surya Namaskar) is a classic sequence of postures. It’s great for warming up the body. This sequence consists of 12 postures that flow into one another. Sun Salutation is known to cleanse the body, both physically and energetically. It also balances and energizes your body before doing more advanced poses.
You can use it as a warm-up or repeat multiple times in your practice to create continuity and build heat. The main postures are:
- Tadasana (Mountain Pose)
- Urdhva Hastasana (Upward Salute Pose)
- Uttanasana (Standing Forward Fold Pose)
- Ardha Uttanasana (Half Standing Forward Fold Pose) or Padahastasana (Hand To Foot Pose)
- Plank Pose
- Chaturanga Dandasana (Four Limbed Staff pose)
- Urdhva Mukha Svanasana (Upward Facing Dog Pose)
- Adho Mukha Svanasana (Downward Facing Dog Pose)
When you finish, repeat the same poses in reverse order from downward facing dog to mountain pose. This yoga sequence is an offering of gratitude. So, be mindful with each movement!
Standing Sequence
Start your yoga sequence with standing postures. They are great for core strength and stability. Begin with Mountain Pose (Tadasana). Then move to Half Moon Pose (Ardha Chandrasana) and Triangle Pose (Trikonasana). Backbends such as Half Bow Pose (Ardha Dhanurasana) and Ox Breath (Ustrasana) can also be practiced. Finally, relax with Child’s Pose (Balasana) and Corpse Pose (Savasana).
Avoid forward folds since they may overstretch the lower back.
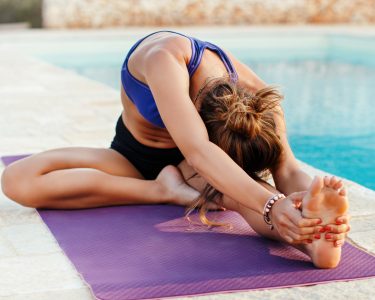
Seated Sequence
Seated yoga sequences can relax your body, no matter where you are. It doesn’t need much space or equipment. Warm up, then focus on key poses to target different areas. Here are some gentle movements you can include:
- Seated Cat-Cow: Sit tall with legs crossed and hands on knees. Gaze towards the ground. Breath in while arching the spine like a cat. Breath out while lowering the chin and curling forward like a cow.
- Seated Spinal Rotations: Sit tall cross-legged, hands on one knee. Twist towards one side as you exhale. Repeat two or three times on each side. Keep your neck long and lifted.
- Seated Forward Fold: Sit tall with legs outstretched. Reach up with arms and breath in. Exhale and fold over legs. Keep feet flexed. Hold for five breaths.
- Reclined Cobbler’s Pose: Lie down flat on back. Bend knees, bring feet together towards pelvic area. Use props if needed. Keep breathing deeply. Hold for 10-15 breaths. Return back up.
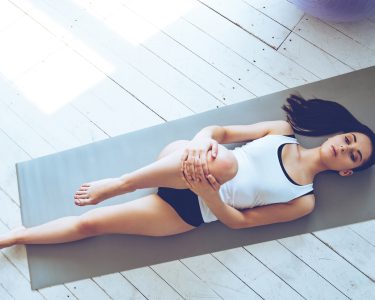
Supine Sequence
A supine sequence is a series of yoga poses done while lying down. It’s great for relieving tension and back pain, as well as improving posture and overall strength. It also calms the mind and creates inner balance.
Leg lifts, hip openers, spinal twists, chest openers, hamstring stretches, and shoulder exercises are the basics. You can add core work or arm balancing for a more dynamic practice. Start with one pose at a time until you’re comfortable. Then, gradually add two or three poses that flow together.
Remember to breathe deeply before each posture. And after any strenuous exercise, do restorative poses like Child’s Pose to cool down and soothe any aches.
Step-by-Step Instructions
Yoga is the best for a pain-free back. Strengthening and stretching with yoga can reduce or even stop chronic backaches. Doing yoga correctly is the key to getting the most out of it.
Here’s how to make a yoga sequence for a pain-free back. Step by step instructions included!
Sun Salutation
The Sun Salutation is a sequence of yoga postures known as Surya Namaskar. It helps loosen tight muscles and ligaments in the back as well as strengthen core abdominal muscles. It also helps with physical and emotional balance. If you’re new to yoga, it’s best to speak to a certified instructor before attempting this. Here’s a step-by-step guide:
- Stand tall on your yoga mat with your feet together and arms at your sides.
- Put your palms together in front of your chest in Namaste or Anjali Mudra position and gaze ahead or close your eyes.
- Inhale and press down through your feet while raising your arms above your head and arching your spine slightly.
- Exhale fully and lower your arms to your sides while folding forward at your hips to touch the floor with your fingertips, palms facing up. Engage your core abdominal muscles throughout this posture.
- Inhale and step one foot back into a low plank position (like a push-up, but with your hands flat underneath your shoulders). Keep your toes pointing towards each other and engage your core and glutes as you lift up from the low plank position, creating an inverted V shape from your toe tips to your shoulders to your hips. Make sure your hands are pressing firmly into the floor throughout the entire pose and that your head is aligned over your neck.
- Exhale fully and lower down through your elbow side of the plank, tuck your chin slightly away from your right ear and bring your belly button towards your spine/floor.
- Inhale and press through the full arm length, releasing any weight in your body onto the floor while simultaneously uplifting your chest and keeping your eyes gazing forward.
- Repeat steps 4-7 three times, then move onto the next sequence by stepping one foot beside the other, both feet still flat on the floor. Spread your feet throughout the entire sole and ground through either the left or right second toes. Exhale to lower down into a squatting position like a frog, but keep your heels tucked towards your pelvis. Rise up and breathe deeply, accentuating your flexing abdominals for stability.
- Push away off the balls of your feet, lifting yourself onto your toes, inverting your heart shape and lifting under your eye area while gazing upwards throughout the pose.
- Come out by inhaling for 3 counts and bringing yourself flat footed on the ground, palms top of your yoga mat. Place both hands gently behind you for support and take at least 10 deep diaphragmatic breaths – this is what makes all the difference!
Standing Sequence
The standing sequence is great for stretching the body. It opens up energy, helping you gain strength, balance and flexibility. To get the most out of it, keep your breath slow and even. Hold each posture for up to 5 breaths before moving.
Here’s a step-by-step guide:
- Start in Tadasana (Mountain Pose). Balance your weight on both feet.
- Reach your arms high above your head for Rajakapotasana (Pigeon Pose). Arch your back as you exhale.
- Do Cat-Cow Pose onto all fours. Inhale when arching your back. Exhale when tucking your tailbone.
- Lift one leg while keeping both arms extended in Utkatasana (Chair Pose). Transfer weight onto one foot at a time. Practice balance and gain strength in legs and hips.
- Move into Trikonasana (Triangle Pose). Shift away from body centerline and reach over one leg. Inhale and reach overhead with opposite arm. Exhale and sweep forward into Ardha Chandrasana (Half Moon).
- Zip or press your thighs together. Stand back onto both feet and extend arms out wide. Repeat 3-5 times.
- End with Uttanasana (Forward Fold). Swing side-to-side. Slowly rise up using breath control. Then slowly come into Savasana (Corpse Pose).
Seated Sequence
The seated sequence is a great way to prep your body for more advanced postures, such as backbends and inversions. Also, it can provide relief to back pain. Here are the steps:
- Sit on your mat with legs crossed. Put one hand on your belly and the other on top of your knee. Now, close eyes and take five deep breaths. Inhale through nose and exhale out of the mouth.
- Lengthen the spine and keep a neutral position in the hips, core and shoulders. Engage them slightly and take deep inhalations. Twist or side bend, making sure to keep an even pressure between both sides. Hold each twist or bend for several breaths. Build up to 10 seconds before releasing into a neutral spine position.
- Move into Cat-Cow cycles. Make slow movements like gentle waves. Go deeper into your own body. Focus on the spine while stretching deeply and actively focus on breathwork. Inhale during Cow pose. Hold for 7 seconds. Exhale and arch towards the floor. Take 7 nice deep breaths. Come back up gently onto all fours. Alternate these two without reaching maximum flexibility range.
- Relax neck muscles without overdoing it. Return to gentle cross-legged seated posture for closing moments. Take few calming breaths and visualize a pleasant, relaxed state. Let all worries dissipate. Now, open eyes.
Supine Sequence
Tired of back pain that won’t go away? Yoga can be incredibly helpful! It works both in the short and long term for soreness, tightness, and tension.
Yoga focuses on creating balance between strength and flexibility.
This Supine Sequence is designed to target key areas of back tension and provide lasting relief. Here’s how:
- Lie down on your back, knees bent and feet flat on the floor, hip distance apart. Put one hand between your shoulder blades. This creates a base, arching your upper back and supporting the lower body.
- Inhale, then exhale as you press down into your feet to lift your hips above your ankles. Hold for 3 breaths, then slowly lower hips. Repeat 5 times. Inhale up and exhale down each cycle.
- Come into a vertical spine one last time. Gently lower yourself to starting position and take 3 deep breaths in Child’s Pose on your stomach. This relaxes any overactive muscles and nerves, allowing movement and stretch.
Conclusion
Conclude we must: Regular yoga? Yes! If done correctly, it’s a great way to ease lower back pain. Not much time? No problem! Simple yoga poses or sequences can still help.
- Strengthen core
- Relax the spine
- Stretch it out
These are all ways to keep your body in prime condition. Lower back pain? It won’t stand a chance!
Summary of Benefits
Yoga is an old practice that helps us return to a place of balance, comfort and well-being. Practicing regularly can make us more limber and resilient, and balance our whole body. There are many poses and sequences that target pain in the lower back, like sciatica, disc injury or arthritis.
By using proper form and repeating it, we strengthen muscles and bones in all directions, which is great for a healthy back. Yoga isn’t just good for the body though, it can also aid emotional and spiritual healing.
By being mindful, it increases body awareness, which helps us with better posture, so we don’t cause further harm or irritate existing conditions. Combining strength training, stretching and slow movements found in yoga, is a great way to help with lower back pain and improve our overall health and physical performance!
Tips for Beginners
Beginner’s tips for yoga sequences on your back? Here ya go!
- Set goals that are achievable: Start slow, read your body and steadily increase intensity.
- Practice regularly: Aim for 3 days each week to de-stress, improve flexibility and motion.
- Pay attention to alignment: Be sure body is correctly aligned to get the most from the poses and avoid injuries.
- Take breaks when needed: Rest poses like Child’s Pose give your tight back muscles a stretch and relaxation.
- Talk with an instructor: A certified instructor will help you modify poses for safety and maximum results.
Frequently Asked Questions
Q: How can yoga sequences help with back pain?
A: Yoga sequences can help with back pain by stretching and strengthening the muscles in the back, improving flexibility and range of motion, and promoting relaxation and stress relief.
Q: What are some recommended yoga poses for a pain-free back?
A: Some recommended yoga poses for a pain-free back include downward dog, cat-cow stretch, child’s pose, pigeon pose, triangle pose, and the sphinx pose.
Q: How often should I practice yoga sequences for a pain-free back?
A: It is recommended to practice yoga sequences for a pain-free back at least 2-3 times per week, and more frequently if possible. Consistency is key to achieving long-term results.
Q: Can yoga sequences worsen my back pain?
A: It is important to listen to your body and not push yourself beyond your limits. If you experience any pain or discomfort during a yoga sequence, modify the pose or stop altogether. Consult with a healthcare professional if you have a preexisting back condition.
Q: Can beginners practice yoga sequences for a pain-free back?
A: Yes, beginners can practice yoga sequences for a pain-free back with modifications and guidance from a qualified instructor. It is important to start slowly and gradually increase the intensity and duration of your practice.
Q: Can yoga sequences completely cure my back pain?
A: While yoga sequences can provide relief and improve flexibility and strength in the back, they may not cure all types of back pain. It is important to consult with a healthcare professional for a proper diagnosis and treatment plan.