Introduction
Yoga has been around for centuries! It’s a great way to gain strength and flexibility. Plus, it keeps you healthy. Intermediate poses can help you get the right balance of back, core, and posture.
Let’s take a look at some of those intermediate poses that can help you stay fit and healthy:
Benefits of Yoga for a Healthy Back
Yoga is an old form of exercise used for healing and calming for many years. Science has confirmed many health benefits connected with regular yoga, such as improved strength, flexibility, balance, and posture. This all aids in keeping a healthy back.
From basic movements to difficult poses and stretches, yoga can be adapted to any level and ability. Restorative postures provide easy stretching exercises that help the body relax. Seated or standing postures are ideal for stretching troublesome areas. Dynamic poses promote muscle strength, while arm balances test balance and stability. Inversions nourish the spine by boosting blood flow to the head. Each position helps maintain a healthy spine by increasing flexibility in muscles and connecting joints and ligaments in other parts of the body.
As an extra or alternate method to physical therapy or chiropractic care, including intermediate yoga poses into your routine can help maintain a healthy back over time. Below we discuss some easy intermediate yoga poses that are beneficial for both prevention and treatment related to back pain.
Warm-up
Yoga is fab for strength-building, stress relief, and better health. Before trying any intermediate poses, warm up! Focus on stretching and getting body ready for poses. This’ll make sure your muscles are fit and you get the best out of the practice.
Cat-Cow Pose
Cat-Cow Pose is an intermediate-level exercise. It’s great for stretching and strengthening your spine. Plus, it helps relieve tension in the back. It’s a good warm-up before beginning standing or seated posture exercises.
To do this pose:
- Start on your hands and knees. Put your hands under your shoulders. Place your knees under your hips. Keep your body as flat as possible. Don’t arch your back or sink into the floor.
- Inhale and focus on lengthening your spine. Exhale and engage your abdominal muscles. Draw your belly towards the floor while arching your tailbone. Repeat this several times. Mentally focus on allowing your vertebrae to move freely. This helps to become aware of any tightness in the back muscles.
When you’re done, slowly come onto all fours for Child’s Pose. This is a final stretch before starting postural work.
Downward Facing Dog
Downward Facing Dog, or Adho Mukha Svanasana, is a standing yoga pose. It’s for transitioning between poses and warming up the body. Plus, it helps with balance and flexibility. It’s great for all levels of practice.
Start by facing a wall. Place your hands on it at shoulder height. Spread your fingers apart. Then breathe in and press through your hands to make an inverted “V” shape. Straighten your arms and legs. Press down into the palms of your hands and feet. Breathe deeply for five breaths. Focus on good posture. Keep your hips high and shoulders back.
On an inhale, bend one leg at the knee. Keep the thigh parallel to the ground. If there’s tension, release it. Spread energy through all ten toes. Press back up. Pause here for five breaths. Then release one vertebrae at a time until your feet are firmly planted. Smile!
Child’s Pose
Child’s Pose is a gentle yoga pose to begin with. It helps to reduce stress and create peace. It also stretches the back, hips, thighs and ankles.
To get into Child’s Pose:
- Kneel on the floor with your knees wider than hip distance apart. Keep your toes touching behind you.
- Place your hands on the floor, palms facing down. Bend your elbows outward to chest height. Keep your arms close to your body.
- Inhale, lengthen your spine and lift your neck up. Gaze forward or up if comfortable.
- Exhale slowly and sink your torso towards the floor. Push gently into your feet and hands until your forehead reaches the mat. Relax your arms out in front or press into the sides of your body. If comfortable, release your sit bones back to your heels for deeper hip opening.
- Stay here for 5-10 breaths. Then release the posture by sitting up tall or coming onto all fours. Repeat this 1-3 times before beginning additional poses. Enjoy!
Sun Salutations
The Sun Salutation is super crucial for a sturdy and hale back! It’s a combo of stretching and strengthening to aid in better stance and suppleness. In this piece, we’ll review a few of the intermediate yoga poses in the Sun Salutation practice.
Half Sun Salutation
Half Sun Salutation, or Ardha Surya Namaskar, is a gentle warm-up for experienced and beginner yogis alike.
- Start at the top of your mat and take a few deep breaths. Step back into Plank Pose with hands below your shoulders. Hold for 3-5 breaths.
- Inhale and lower onto your stomach. Exhale and lift into Cobra Pose. Hold for 3-5 breaths.
- Inhale and half-rise around. Place weight onto feet evenly. Place hands back onto floor in between legs. Exhale into Downward Facing Dog Pose. Hold as long as comfortable (1-10 breaths).
- Inhale into Plank Pose. Exhale into Cobra Pose. Hold each pose again 3-5 breaths.
- Finally, release back down onto stomach and relax.
Full Sun Salutation
The classic yoga exercise, Surya Namaskar (aka Full Sun Salutation), is a great foundation for beginner yogis. This modified version is perfect for intermediate practitioners.
Focus on your body’s alignment and breathing as you move through the poses. Keep your breath smooth and steady, paying attention to the lengthening spine. Move at a comfortable pace. If it feels too fast or easy, add extra repetitions.
- Mountain Pose (Tadasana) – 4 slow breaths
- Raised Arms Pose (Urdhva Hastasana) – 4 slow breaths
- Standing Forward Bend (Uttanasana) – 4 slow breaths
- Four Limb Staff Pose (Chaturanga Dandasana) – hold 5 breaths
- Upward Facing Dog Pose (Urdhva Mukha Svanasana) – 5 breaths
- Downward Facing Dog Pose (Adho Mukha Svanasana) – 10 breaths
- Standing Forward Bend (Uttanasana) – 4 slow breaths
- Raised Arms Pose (Urdhva Hastasana) – 4 slow breaths
- Mountain Pose (Tadasana)-4 slow breaths
Standing Poses
Standing poses are the basis of yoga. They help build strength and improve balance and posture. Core strength can also be increased with regular practice of these poses, which can be beneficial for the spine.
Here are some of the best standing poses for a healthy back:
Warrior I
Warrior I is a standing pose with many benefits. Physically it works the legs, improves balance and stabilizes the torso. Emotionally, it creates a feeling of freedom. Mentally, it clears thoughts and increases focus.
To practice this pose, start in Mountain Pose (Tadasana). Inhale and step your left foot back into Lunge Pose (Anjaneyasana). Exhale and bend into Warrior I. Inhale and spread your legs wide apart. Your front knee should be above your ankle. Straighten your back leg from the lunge downwards. Simultaneously press your palms or fists together high above your head. Keep your gaze steady forward or upward. Engage your core throughout. Shape your shoulders into a “V” across your chest. Keep relaxed for five deep breaths. Slowly bring your feet back together. Reach down towards the earth for stability if needed. Open your chest wide towards the sky. Lastly, step your right foot back into the original starting point. Adjust your breath rate over time.
Warrior II
Warrior II is a popular yoga pose. It builds strength and stability, opens hips, chest, and lungs, and improves posture and balance.
To practice, start in mountain pose with feet hip-width apart. Inhale deeply. Step left foot back 3-4 feet. Make sure toes point outward. Exhale and raise arms parallel to the floor. Bend front knee above ankle. Don’t go beyond toes. Press down into both feet. Draw belly button to spine. Engage core muscles for support. Hold for 5 breaths. Repeat on other side.
Triangle Pose
The triangle pose is a standing posture that strengthens legs, core, and posture. It stretches the hips, groins, hamstrings, side waist, spine, and chest. It also tones the abdominal muscles and relieves lower back pain. This powerful stretching exercise is great for those who sit a lot or don’t have physical activity.
To get into position, stand tall with your feet together and arms by your side. Step one leg length away from each other to form an inverted V shape. Make sure feet are parallel and left foot pointing forward. Place the right foot 45 degrees left so the heels are aligned. Inhale deeply and exhale while rotating torso to the left side. Reach right arm up overhead. Keep spine lengthened by reaching both sides of the room. Look up towards fingertips or in front if neck feels uncomfortable. Place right hand anywhere within reach without bending further down. Keep head aligned with spine and balance on toes.
- Press four corners of right foot firmly into ground.
- Engage abdominals to keep center strong.
- Firmly press outer edge of right foot and come onto tip toes if needed.
- Breathe slowly few times here then release as you inhale.
- Come back upright onto both feet and join palms at heart centre for salutations seal.
- Repeat same steps on other side.
Half Moon Pose
Half Moon Pose (Ardha Chandrasana) is a stand-up balancing pose. It increases flexibility in the hips and spine, strengthens abdominals and builds core stability. It also opens up the chest, increases energy and relieves stress.
Start in Mountain Pose (Tadasana). Stand with feet shoulder width apart. Weight evenly distributed. Inhale and lift arms to the sky. Bring palms together in prayer position. Firmly press into your hands. Exhale and slowly bend forward from hips. Take hold of left ankle or calf muscle with right hand. Extend left arm directly above with palm facing away. Create a straight line from feet to fingertips. If needed, move left foot back until leg is straight. Check in the mirror. Hold for two to three breaths. Transition out of pose by repeating on the other side or slowly reversing into Mountain Pose.
Seated Poses
Seated poses can be a great way to build strength and posture, while also releasing tension in your back. Even the newest yogi can do these poses, which range from mild to moderate. With the right technique and mindful breath, you can learn how to safely stretch and strengthen your spine.
Let’s get into the details and check out the seated poses!
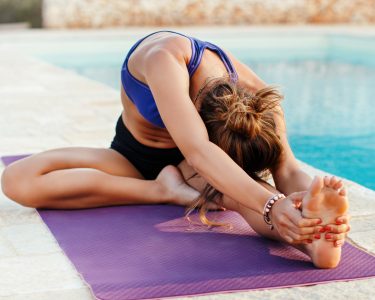
Seated Forward Bend
Seated forward bends are great! This pose helps align your body and increase spine mobility. It’s quite easy and you can hold it for several minutes, depending on comfort. It stretches the lower back, improves posture, and reduces stress levels.
To do it, sit with legs outstretched. Make sure your back is upright. Place one hand behind your sacrum bone. Shoulders should be down and away from ears. Press into ground with both sitting bones.
- Inhale deeply.
- Exhale, round from upper back, keeping chest lifted. Extend arms out with palms down or interlace fingers.
- Fold forward towards feet, keeping waist length. Stay there for breaths. Relax further each exhale from mula bandha (root lock).
- To finish, lead with inhale, lift up.
Reclining Bound Angle Pose
Supta Baddha Konasana, or Blissful Reclining Pose, is a seated pose that stretches the inner thighs and groins. It’s a deeper version of Bound Angle Pose.
You begin by sitting on your mat, folding forward, and bending both knees. Bring your feet together and hug them towards your body until you feel a good stretch. Keep your chest broad, draw your shoulder blades down onto your back ribs, and keep micro-bends in both elbows. Let your shoulder blades melt down onto the ground away from your ears. Press your hands into props at the sides of your body to relax your hips and expand your chest cavity with each inhalation. Stay in this pose for 3-7 minutes.
When you’re done, follow reclined angle pose with other balance postures, such as reclined hero or reclined twist. This will free up your lower back stiffness and immobility, and help to therapeutically massage your spine.
Seated Spinal Twist
Seated Spinal Twist is a restorative seated yoga pose. It’s great for stretching the spine and improving posture. Plus, it can help tone and strengthen your abdominal muscles and give your lower back a gentle massage.
To get in this pose, start in a cross-legged seated position. Place your right arm behind you with the elbow facing out. Then, keep your left hand next to your left hip with the palm facing up. Now, lift your spine up tall. Engage your core and find length along your back.
Begin to twist your torso from the base of your spine towards the right side of your body. Hold onto your right knee or shin with both hands. Don’t pull too much with the arms. Let go of tension in other parts of your body and focus on breathing deeply into your abdomen and rib cage area.
Repeat on the opposite side. Then come back to center after each side. Rest your hands on your knees and allow your spine to relax. Repeat once more for 30 seconds for each side if it feels comfortable. Then move onto other poses or release out of the pose completely.
Cool Down
Yoga poses done? Great! Now, it’s time to cool down. A few calming poses can help reduce stress and boost flexibility. Plus, they’ll reduce soreness and get you ready for the next session. Check out the best cool-down poses for intermediate yoga!
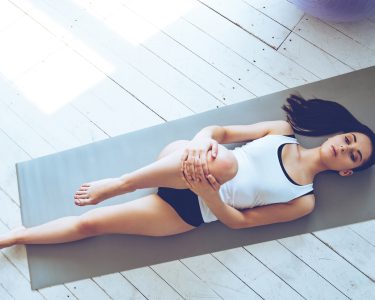
Corpse Pose
Corpse Pose, or Shavasana, is a yoga staple. It is done at the end of each session to take your body to a comfortable, neutral place. To reach relaxation, sink into the deepest layers until you become immobile. Self-awareness is grown here, and it reveals where we hold tension and what emotions we need to address for a fulfilling life.
This pose is easy – lay on your back, feet hip-width apart, toes falling away. Put your arms at your sides, palms up. Relax every muscle, from head to toe, and let go of any tension. Take slow, deep breaths and stay in this position 5-20 minutes–or however long feels right. Notice the release of your body as you relax. Be aware of any physical sensations that may appear. This will enhance the experience.
Legs Up The Wall Pose
Legs Up The Wall Pose (Viparita Karani) is an intermediate yoga move. It’s name comes from Sanskrit and it’s also known as “wall pose“. This exercise helps reduce stress and energize you.
It’s great for countering things like sitting at a desk, driving, cycling, or running which can cause imbalances like tight hips and back pain. It increases circulation in the lower body and gives restorative benefits to the whole body.
To do this pose:
- Start by lying on your back with legs against a wall.
- Put both sit bones firmly on the floor, arm’s distance from the wall. Use props like pillows or blankets if needed. Gravity should do most of the work – be careful not to strain your hips or back.
- Relax into the pose. Use deep breaths and high chest breathing to raise energy levels.
- Hold for 1-10 minutes depending on how it feels. Take breaks if needed.
- Roll off from side lying when finished. Then just stand up.
Conclusion
Practicing yoga? Make sure to use poses that promote back health! Intermediate poses give you the perfect balance between relaxation and muscle strengthening. This can help reduce pain and lower the risk of injury. Keep at it, with patience and discipline. Plus, get advice from a pro yoga instructor. Eventually, you’ll find relief from lower back issues and aches.
Frequently Asked Questions
Q: What are intermediate yoga poses?
A: Intermediate yoga poses are the ones that require some experience and basic understanding of yoga postures. They include poses that are not as simple as beginner poses but not as challenging as advanced poses.
Q: Can yoga help with back pain?
A: Yes, yoga can help relieve back pain by improving posture, increasing flexibility and muscle strength, and promoting relaxation and stress relief.
Q: Which intermediate yoga poses are best for a healthy back?
A: Some intermediate yoga poses that are good for a healthy back include Sphinx pose, Half Lord of the Fishes pose, Reverse Plank pose, Triangle pose, Downward Facing Dog pose, and Cat-Cow pose.
Q: How do I maintain the perfect balance in intermediate yoga poses?
A: To maintain the perfect balance in intermediate yoga poses, focus on your breath, engage your core muscles, maintain a neutral spine position, and use props if necessary.
Q: Can I do these intermediate yoga poses if I have a back injury?
A: It is important to consult with a healthcare professional before doing any type of physical activity if you have a back injury. Some poses may need to be modified or avoided altogether.
Q: How often should I practice intermediate yoga poses for a healthy back?
A: Practicing intermediate yoga poses for a healthy back 2-3 times per week is recommended, especially if you spend a lot of time sitting or standing in your daily life. However, it is important to listen to your body and not overdo it.